I don’t have a dedicated hobby space in my home. I keep most of my painting supplies in an old network switch box and my miniatures are secured in various plastic storage tubs. As such, I don’t have a great set-up for taking photos of the completed miniatures (doesn’t help that I just use my phone) and often end up with slightly blurry images.
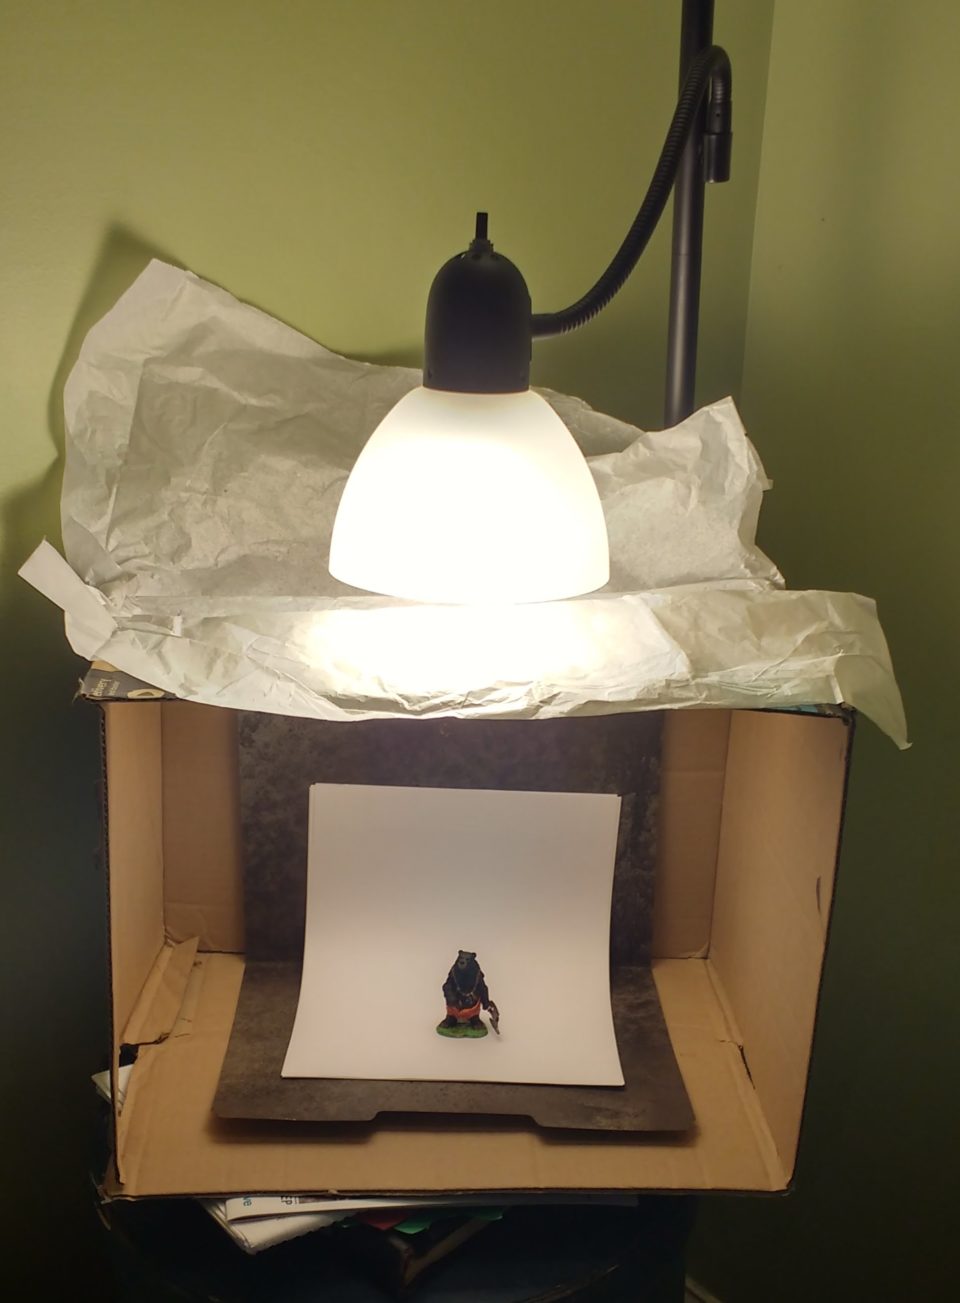
I got fed up with this after painting the Reaper Bones Werebear. It was one of my favorite miniatures to paint and I was quite proud of the end result, but you wouldn’t be able to tell from the glared and blurry photo. The next miniature I painted was the largest that I’d painted to date, the Magellanic Nomad. I didn’t want to document it with shoddy photos…so after finishing it I devoted an entire two minutes to putting together a photo box (it took ten times longer for the spraypaint on the backdrop to dry than to put it all together).
You also can have a wonderful photobox just like this… Just follow these simple steps.
- Grab an cardboard box. Lay it on one side and cut a hole in the side facing up.
- Tape tissue paper over the hole.
- Tape in a backdrop. I spray painted one but, actually, white paper works better.
- Place the cardbox with the hole covered by tissue paper directly under a bright light.
And that’s it. The tissue paper will diffuse the light evenly cutting back on glares and blurring. This is something of a barbarian’s approach but, hey, I am the guy who keeps on drowning my miniatures in polyurethane and using floor polish to thin paint.


